 Matt Lorenzen
If you've been on Twitter this week, you've probably seen Moltbot everywhere. The lobster has taken over. People are posting conversations with their bots, showing off weird automations, and generally losing their minds over what this thing can do.
This guide is my attempt to help you set one up yourself. What follows is the exact setup I recommend for someone who isn't particularly technical but wants to try this.
You don't need to be a developer. You just need to follow the steps and be willing to copy-paste some commands.
📚 Official Documentation
This guide covers the basics. For advanced configuration, troubleshooting, and all the features, check the official Clawdbot docs.
⚠️ A Word of Caution
This sets up an AI that can read files, run code, and search the web. That's what makes it useful. But it also means you should treat it with care.
Don't share secrets you'd regret if they leaked. AI systems can be unpredictable. Start with curiosity, proceed with caution.
Before We Begin
Get these four things ready before starting the tutorial. Each takes a few minutes. I'll explain what they're for as we go.
Telegram Bot Token
This is how you'll talk to your Moltbot. Telegram makes it dead simple to create a bot.
- Download Telegram if you don't have it
- Search for @BotFather and start a chat
- Send
/newbot - Pick a name (like "My Moltbot") and a username (like "myname_moltbot")
- BotFather gives you a token. Save it.
Claude API Key
Claude is the brain. You're essentially renting thinking power from Anthropic. Costs vary wildly based on usage and model choice, anywhere from $5 to $500+ per month. Set spending limits and pay attention to your bill.
- Go to console.anthropic.com
- Create an account and add a payment method
- Set a spending limit in Settings → Limits (start with $20-50)
- Go to API Keys and create a new key
- Save it. You won't see it again.
Cost tip: During QuickStart, you can choose your model. The default (Claude Opus) is the smartest but most expensive. Switch to Claude Sonnet to save money while you're learning.
Brave Search API Key
This lets your bot search the web. Free tier gives you 2,000 searches/month, plenty for personal use.
- Go to Brave Search API
- Click Get Started and create an account
- Save your API key.
GitHub Account + Token
GitHub is where your bot saves its memories and files. Free, and means you won't lose everything if something breaks.
- Create a GitHub account if you don't have one
- Click your profile picture → Settings
- Scroll to Developer settings (bottom of left sidebar)
- Personal access tokens → Tokens (classic) → Generate new token
- Give it a name, check repo, click Generate
- Save this token immediately. You can't see it again.
- Create a new private repository (any name, like
clawdormy-bot)
Got all four keys saved somewhere? Good. The QuickStart wizard will ask for them one by one.
Get a Server
Your bot needs a computer that's always on. Think of it like a tiny apartment for your lobster to live in. You'll want a VPS (Virtual Private Server) running Ubuntu.
I recommend Vultr. Sign up, click Deploy New Server, and select:
- Type: Shared CPU
- Location: Closest to you
- Image: Ubuntu 22.04 or 24.04
- Plan: 1 vCPU / 2GB RAM / 55GB ($12/month)
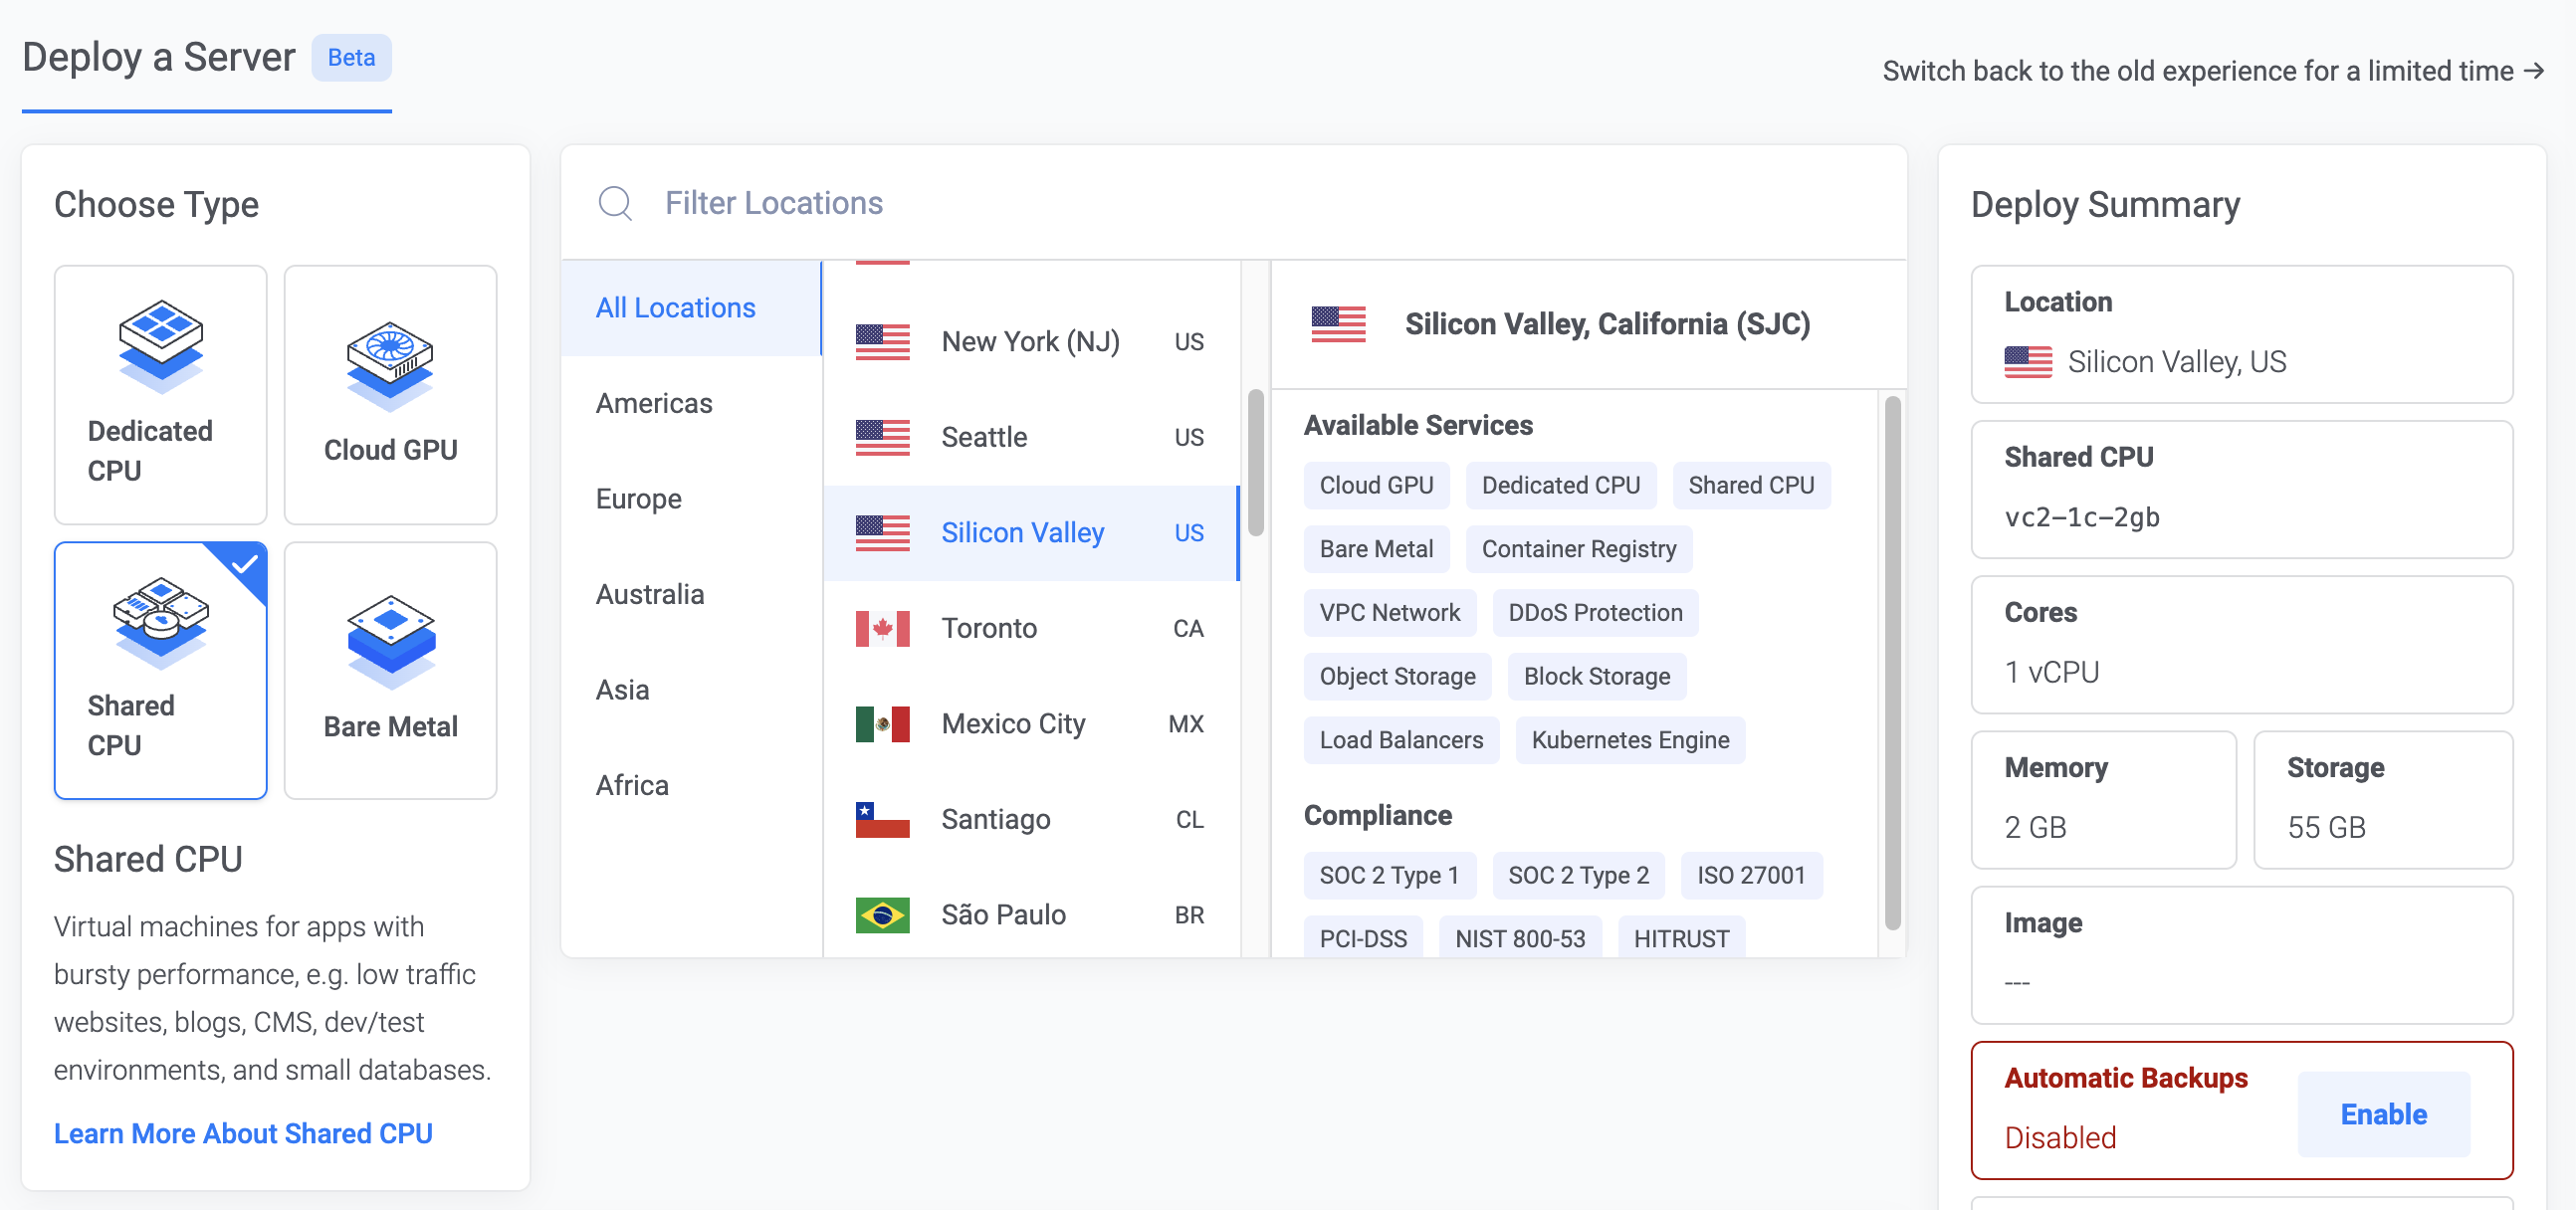
Click Deploy Now and wait a minute for it to spin up. Copy the IP address and root password from the server details page.
🔐 Security Note
Once your server is running, you should secure it with SSH keys and a firewall. This guide assumes you can already SSH into your server.
Clawdbot Install
Now you'll connect to your server. This is where people get nervous, but it's just typing commands into a window. I'll walk you through it.
Open a Terminal
A terminal is just a text-based way to control a computer. You already have one.
Mac: Open Finder → Applications → Utilities → Terminal. (Or press Cmd+Space, type "Terminal", hit Enter.)
Windows: Click Start, type "PowerShell", click Windows PowerShell.
You'll see a window with a blinking cursor. That's it. You're in.
Connect to Your Server
Type this command (replacing YOUR_SERVER_IP with the IP address from Vultr):
ssh root@YOUR_SERVER_IPFor example, if your IP is 149.28.123.45:
ssh [email protected]Hit Enter. It will ask:
The authenticity of host '149.28.123.45' can't be established.
Are you sure you want to continue connecting (yes/no)?
Type yes and hit Enter. Then paste the password from Vultr when it asks. (You won't see the password as you type. That's normal. Just paste and hit Enter.)
If you see something like root@vultr:~# you're in. You're now controlling your server.
Install the Software
Run these commands one at a time. Click any code block to copy it, then paste in your terminal and hit Enter. Wait for each one to finish before running the next.
curl -fsSL https://deb.nodesource.com/setup_22.x | sudo -E bash -sudo apt-get install -y nodejsmkdir -p ~/.npm-global
npm config set prefix '~/.npm-global'
echo 'export PATH=~/.npm-global/bin:$PATH' >> ~/.bashrc
source ~/.bashrcnpm install -g clawdbotRun QuickStart
clawdbot gateway quickstartThe wizard walks you through everything. It will ask for:
- Claude API key — Paste the key from Anthropic
- Telegram bot token — Paste the token from BotFather
- Your Telegram username — So the bot knows who you are
- Brave API key — Paste your search key
Answer each prompt, and it builds your config automatically. No file editing required.
First Contact
At the end of QuickStart, it asks if you want to start the gateway. Say yes. (If you need to start it later, run clawdbot gateway start.)
Open Telegram and message your bot. If it responds, you did it. 🎉
Now here's the magic. Send your bot this message:
Help me finish setting up. Go step by step and wait for me to proceed to next phase.Your bot will walk you through configuring its personality, setting up memory files, and connecting services. It knows what it needs. You just answer its questions.
GitHub Connection
Ask your bot to set up Git. Something like:
Help me connect this workspace to my GitHub repo.Your bot will ask for the repo name, configure Git, make an initial commit, and start backing up its own memory. If anything ever breaks, you can restore from GitHub.
Where to Go From Here
You've got a working Moltbot. Now what? Here are some ideas people are building:
- Reminders — "Remind me to call mom tomorrow at 5pm." Your bot handles scheduling and pings you via Telegram.
- Skills — Browse ClawdHub for pre-built capabilities: weather, calendar sync, home automation, and more.
- Personal Directory — Teach your bot about the people in your life. It'll remember birthdays, preferences, conversation context.
- Trading Bot — Some folks are building market monitors that alert them to opportunities or execute simple strategies.
- Research Projects — Point your bot at a topic and let it dig. It can search, summarize, and compile findings over time.
- Daily News Digest — Have your bot curate news on topics you care about and send you a morning briefing.
For more advanced configuration and features, check the official Clawdbot documentation.
The best way to learn is to just start talking to it. Ask questions. Give it tasks. See what breaks. And when you get stuck, ask the bot for help.
Welcome to the lobster tank. Go forth and moltiply. 🦞